Instruction for Setup:
First Download the Apps From Google Play Store Or Apple Store.
For PC or Laptop, Download Software from this URL: https://www.pbx.com.bd/download/
After purchasing PBX Service from Alpha PBX then you will get PBX service setup information through Email.
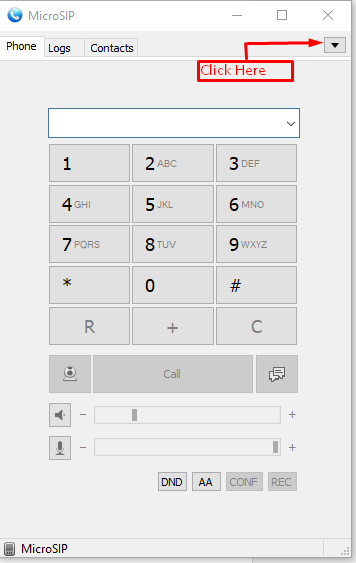
Step 1. Please Open your Microsip Software from Your Computer.
Step 2. Please click on the top right corner "Drop Down" icon, as shown below, and select "Add account".

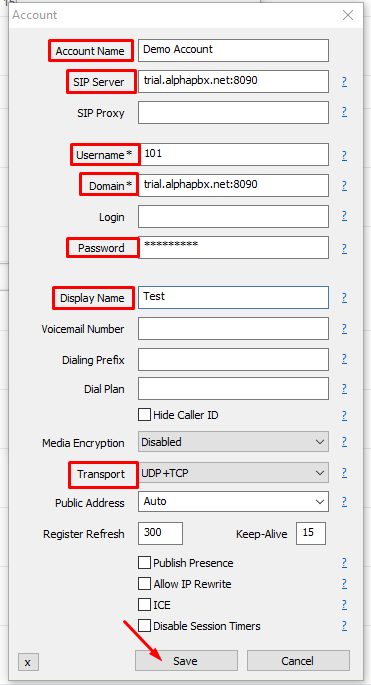
Step 3. Fill up the following form with the information you get from Alpha Net and click "Save".
Account Name: Enter any name (Example: Demo Account)
SIP Server: Enter The SIP Server that you get from Alpha Net. (Example: trial.alphapbx.net:8090 or You can use port 8091 for TLS)
Username: Enter Your Extension that you get from Alpha Net (Example: 101)
Domain: Enter The SIP Server that you get from Alpha Net. (Example: trial.alphapbx.net:8090 or You can use port 8091 for TLS)
Password: Enter The Extension password that you get from Alpha Net.
Display Name: Enter any Name that you want. (Example: Test)
Transport: Select UDP+TCP for 8090 or Select TLS for 8091
See the screenshot file below for the PBX Service Extension setup.
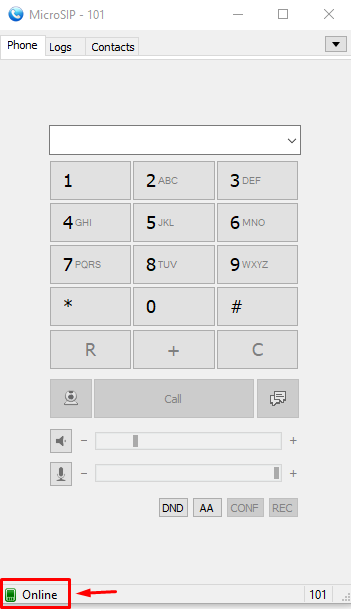
If all settings are correct, then the status will appear as "Online".
See the screenshot file below where you can see your Account Status.
Congratulations !! Now you know how to PBX Service Extension Setup.
