How to configure SIP Account Grandstream IP phone This article will help you with your IP phone configuration.
Step:01 Internet and Power Connection:
Connect your Grandstream IP phone to your network using an Ethernet cable. Make sure the IP phone has power and is connected to the internet.
Step:02 Access Your IP Phone Web Interface:
From your Grandstream phone, navigate to Menu >> Status >> Network Status >> IPv4 Address and note the IP address displayed on this screen.

The IP address may change later based on your network-based system.

Open a web browser on a computer connected to the same network (Router) and enter the IP address of your Grandstream IP phone. By the default, it should be something like http://192.168.0.X
Step:03 Login to Your IP Phone:
Enter the username and password. The default username and password are usually both "admin" 
Note: If the admin password does not work, then you can check the password of your IP phone from the back of the phone
Step:04 Account Setting:
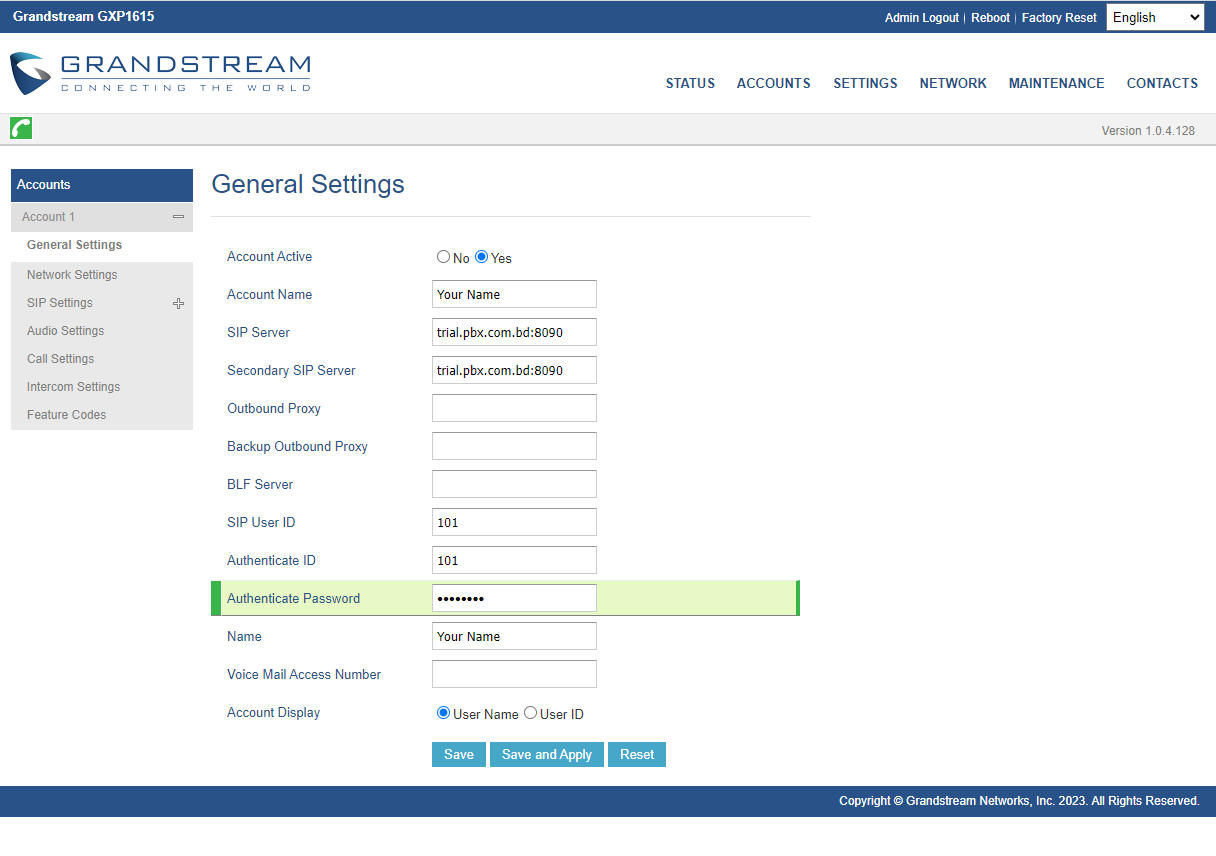
Select the Accounts menu from your Grandstream dashboard and go to the Accounts >> General Settings page.

Step:05 Account Configuration:
Fill in the SIP account details
- Account Active: Enable this account.
- Account Name: Use a meaningful name like yourself.
- SIP Server: trial.pbx.com.bd:8090 (Use your SIP Server Name)
- Secondary SIP Server: Same SIP Server
- SIP User ID: Use your extension number
- Authenticate ID: Same Extensions
- Authenticate Password: Your Extension Password
- Name: Use a meaningful name like yourself

Click Save and Apply
Step:06 Network Setting:
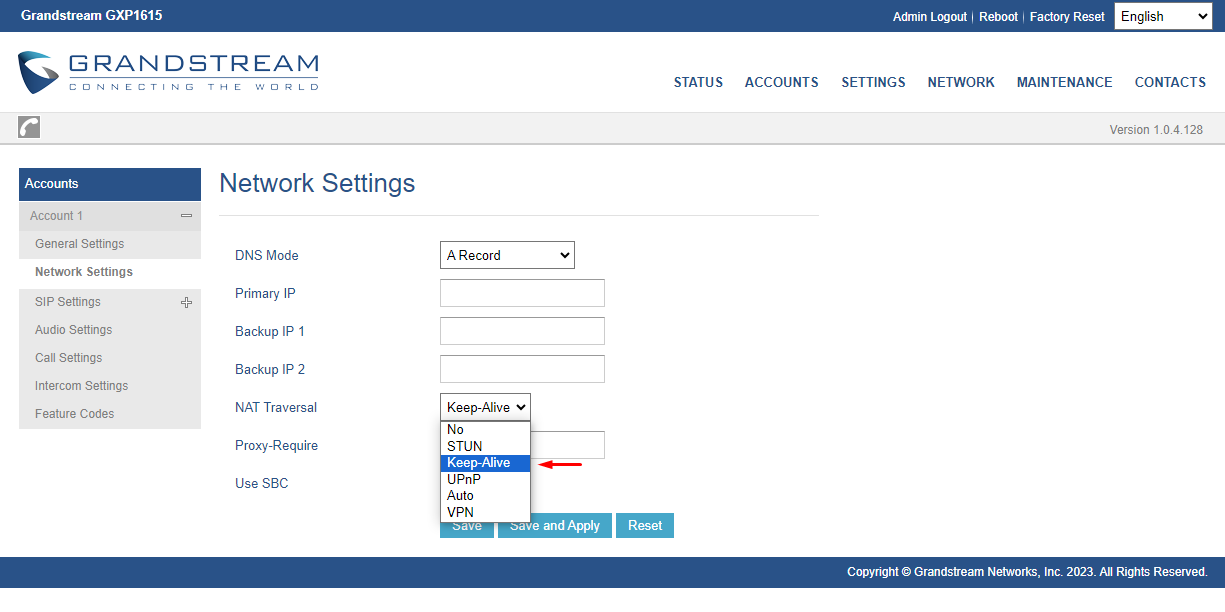
Now you need to change the NAT Traversal option from your IP Number network settings.
Accounts>> Network Settings>> NAT Traversal: Keep-Alive

Click Save and Apply
Step:06 Check your Configuration:
Make a test call to ensure the SIP account is set up correctly

Congratulations! You go to the home page to verify that your phone has been successfully registered and your account status should show green for successful registration. If it fails, you will see red.

