This article provides step-by-step instructions for configuring scheduled WebDAV backup for cPanel.
Creating backups is very important for server administrators to prevent sudden data loss. While manual backups are possible, we recommend configuring automatic backups. It's always good to verify that backups are running and recoverable.
To configure automatic backups in cPanel, go to WHM > Backup >Backup Configuration
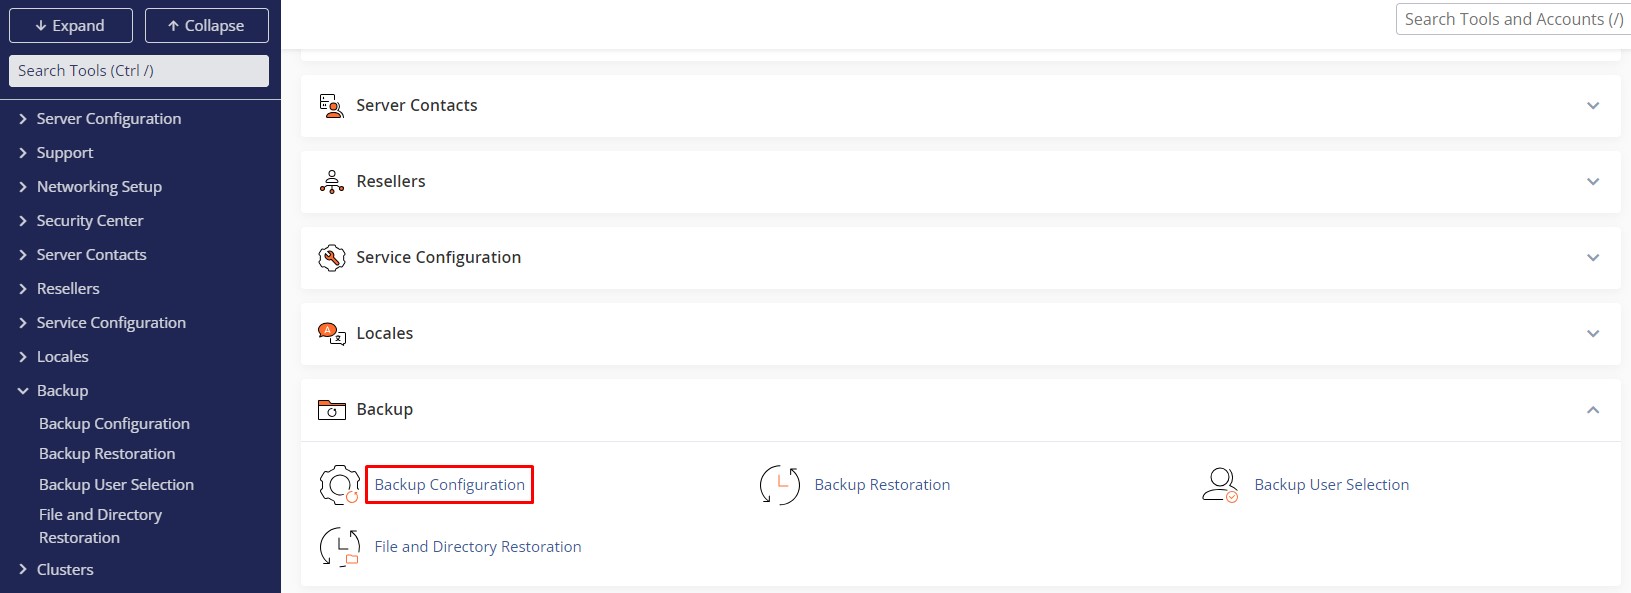
The backup configuration has two major sections to configure the automatic backups.
- Backup Settings
- Additional Destinations
- Validation Results
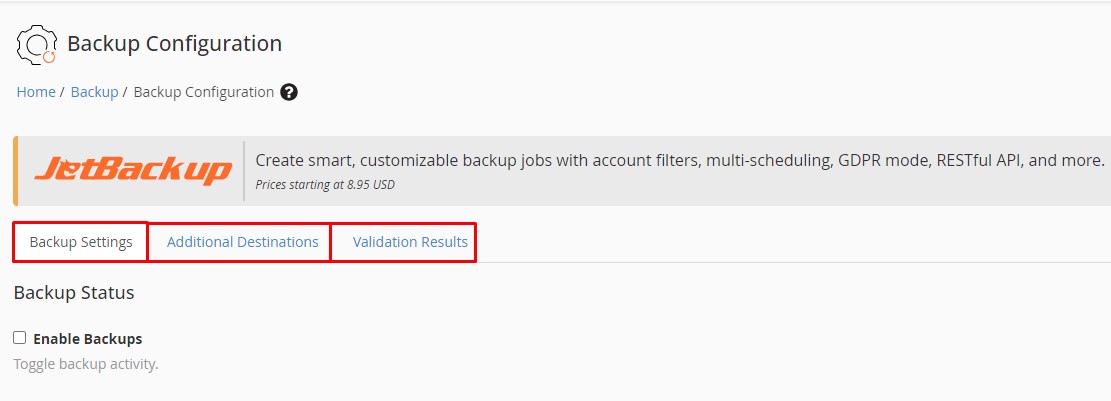
First, you need to set the tick on "Enable Backups". Then we recommend setting the backup to "compressed".
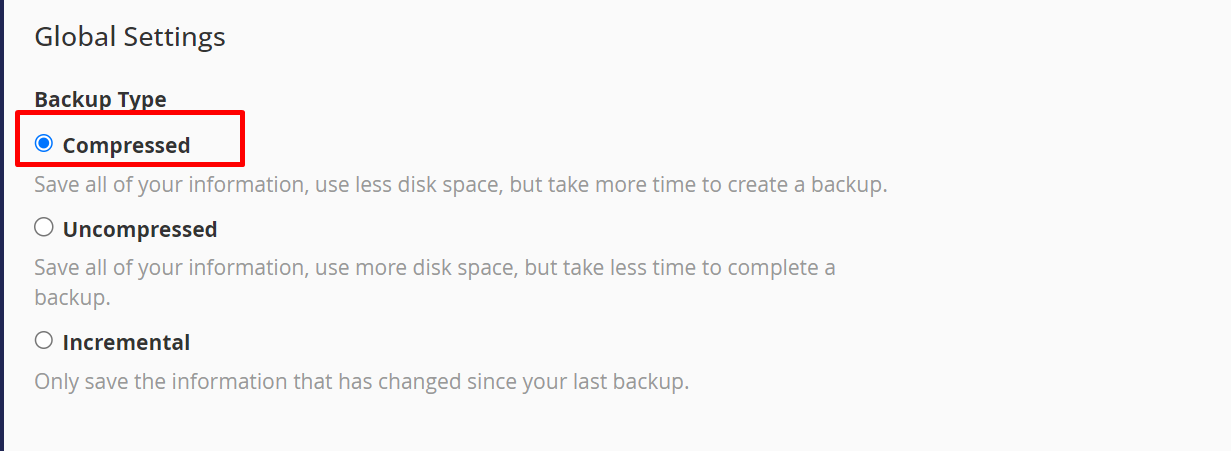
Global setting
Compressed: All data on the server will be saved, and less disk space will be used, but creating a backup will take more time and bandwidth. Compressed backups will be saved in .tar , .gz format.
Uncompressed: All data on the server will be preserved, using the same amount of disk space, but requiring less time to complete a backup. It backs up files without any compression.
Incremental: will only save data that has changed since the last backup. This backup is ideal for keeping the latest backup of your account.
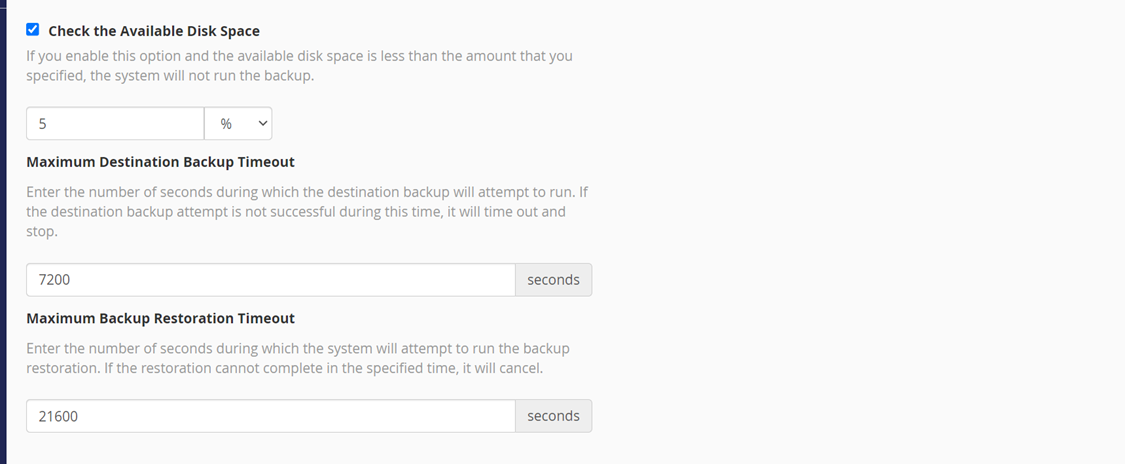
Check the available disk space: If the available disk space is less than the amount you specified, the system will not run the backup
Maximum Destination Backup Timeout: Enter the number of seconds during which the destination backup will attempt to run. If the destination backup attempt is not successful during this time, it will time out and stop.
Maximum Backup Restore Timeout: Enter the number of seconds the system will attempt to perform a backup restore. If the recovery is not completed within the specified time, it will be canceled.
Scheduling and Retention
This is an important part of the backup configuration; Backups can be scheduled and retained on the server/destination using configurable options.
There are three types of schedules cPanel can configure for backup,
Daily backup.
Weekly backups.
Monthly backups.
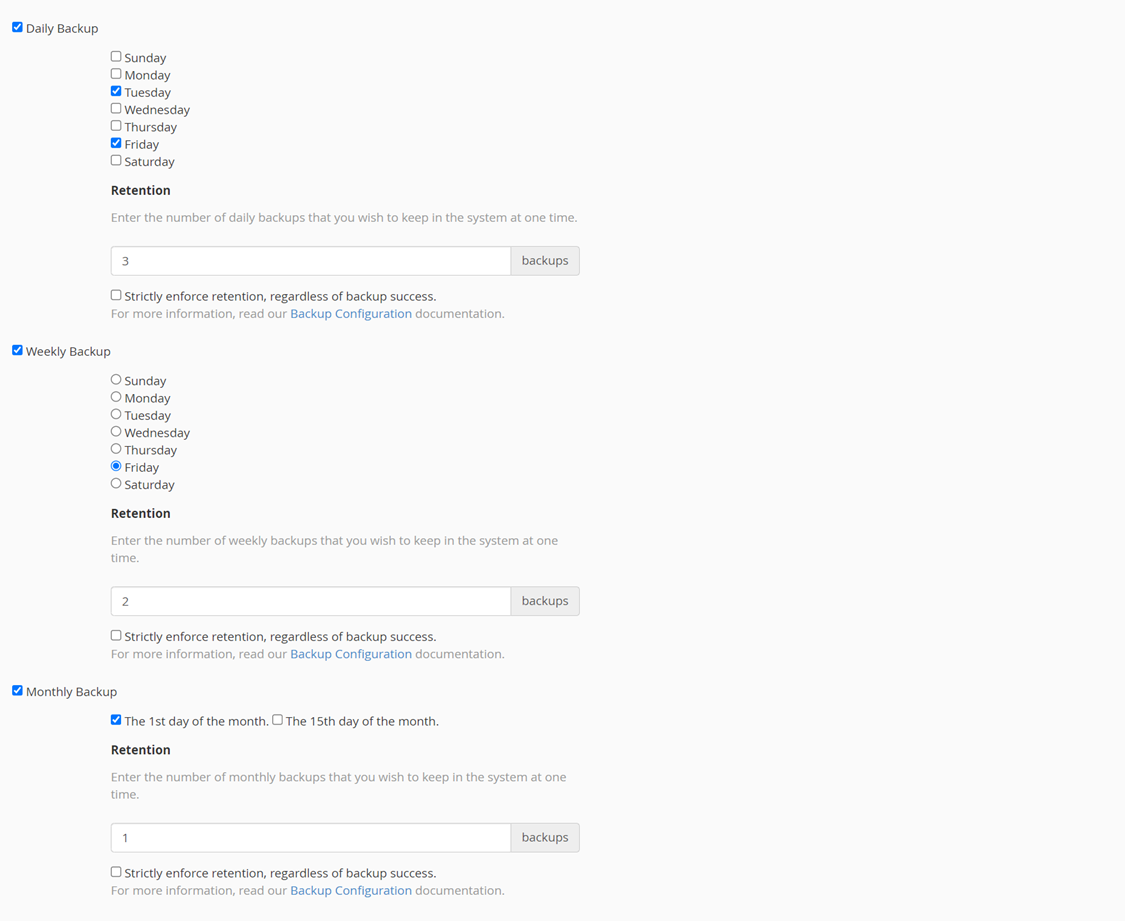
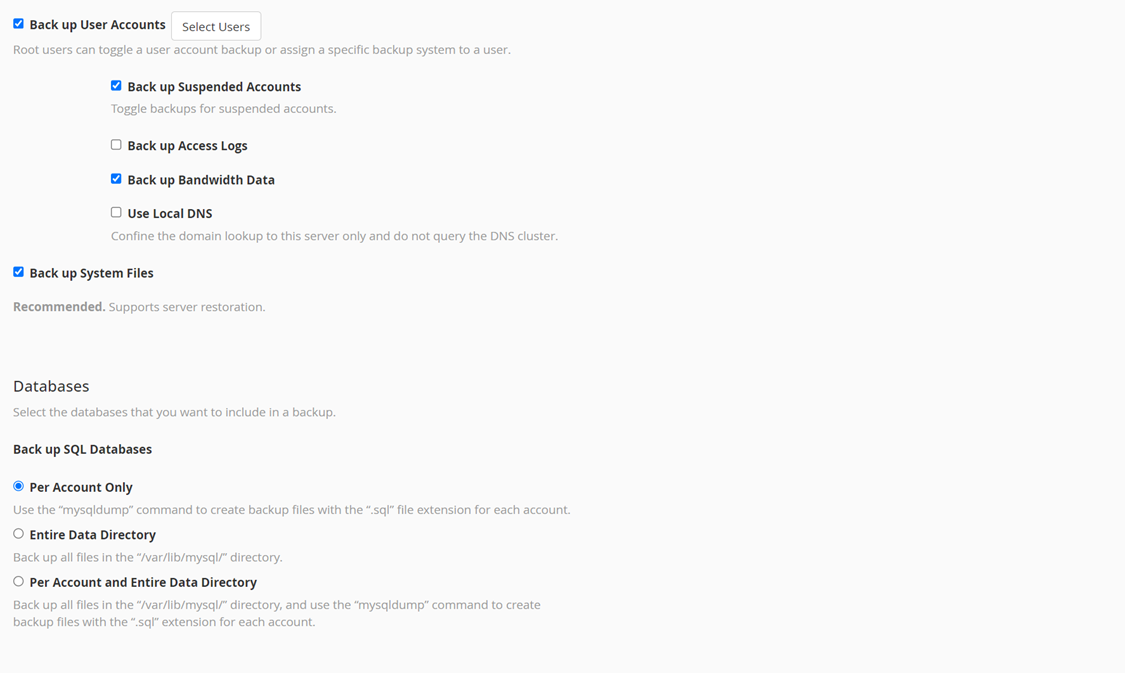
Backup Configuration cPanel has a separate option for database backup and backup can be configured using three types,
Per account only
The complete MySQL directory
Per account and full MySQL manager
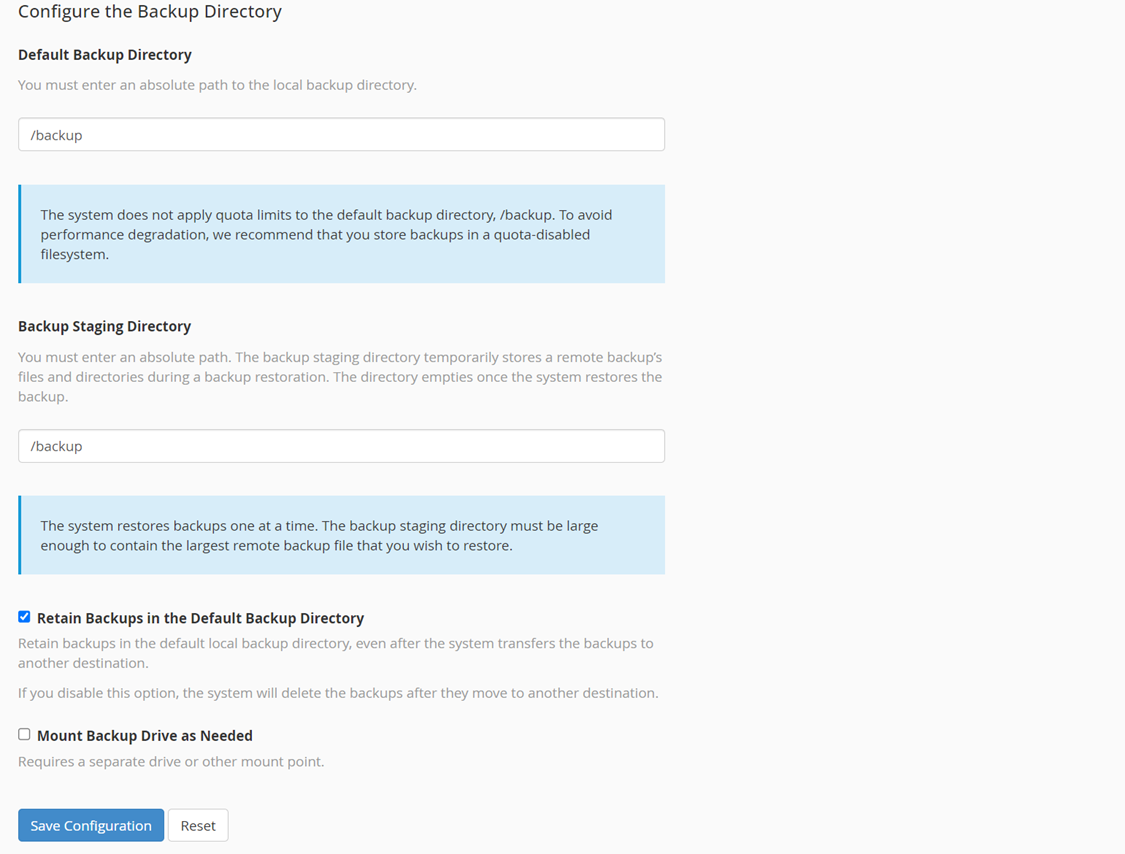
Configure the backup directory
Better to maintain backups in the default backup directory: Maintain backups in the default local backup directory even after moving system backups to another destination. If you disable this option, the system will delete backups after moving to another destination
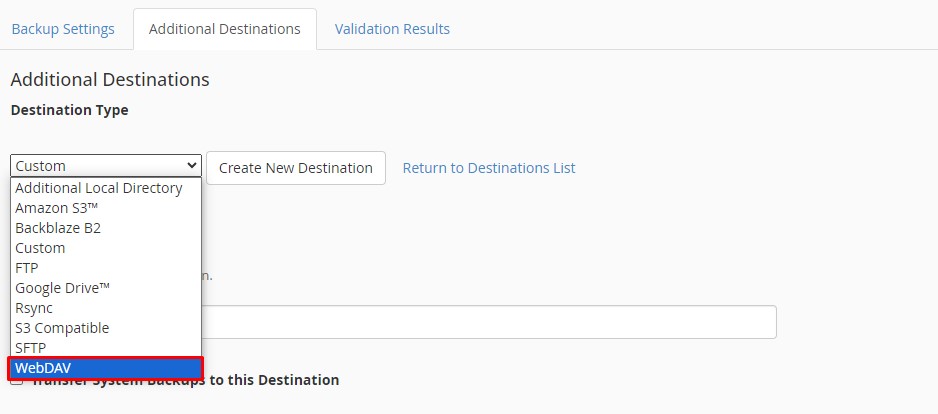
Add Additional Destination:
From the Destination Type dropdown, select WebDav Protocol and Click on the Create New Destination Button
Configure WebDav Settings
Destination Name: Enter a name for this backup destination.
Backup Directory: Specify the directory path on the remote server where backups should be stored.
Remote Host: IP address of the WebDav server OR Hostname.
Remote User: Enter WebDav username.
Remote Password: Enter WebDav User-password.
Port: Enter the WebDav port (Default WebDav Port is 80).
Timeout: Set a timeout value for the SSH connection
Note: We need to Configure with Server SSH information for Rsync backup Destination
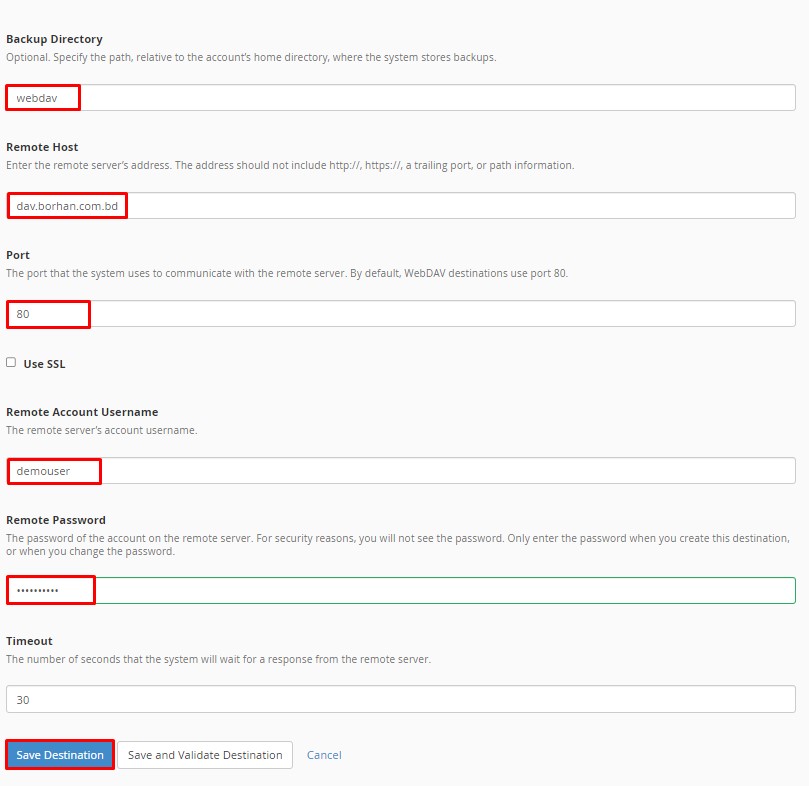
WebDav Connection: Click on Save and Validate Destination to test the connection. If the connection is successful, a confirmation message will appear
Backups can be restored in WHM > Backup > Restore Backup. There you can select "Restore by date" and you will see all available backups in the calendar. Move the users you want to restore to the restore queue With "Recovery", you can restore all listed accounts.

